Kids love crafts… but most of them end up forgotten a few days later.
This sand art memory jar idea is different. Each layer of color represents a special memory from the past year. Everyone creates their own personalized jar, turning a simple activity into something they’ll actually want to keep.
It’s easy to set up, budget-friendly, and one of those rare party ideas that feels just as meaningful as it is fun.
A sand art memory jar party is a simple and meaningful birthday activity where each layer of colored sand represents a special memory from the past year. Kids create their own personalized jars, making it both a fun craft and a keepsake they’ll actually want to keep.
Optional ideas:
Instead of just layering colors, give each one a meaning.
You can assign colors ahead of time or let kids choose what each color represents to them.
Examples:
- Pink = friends
- Blue = sports or activities
- Yellow = favorite moments
- White = hopes for the next year
This simple step turns the activity into something they’ll actually keep and remember.
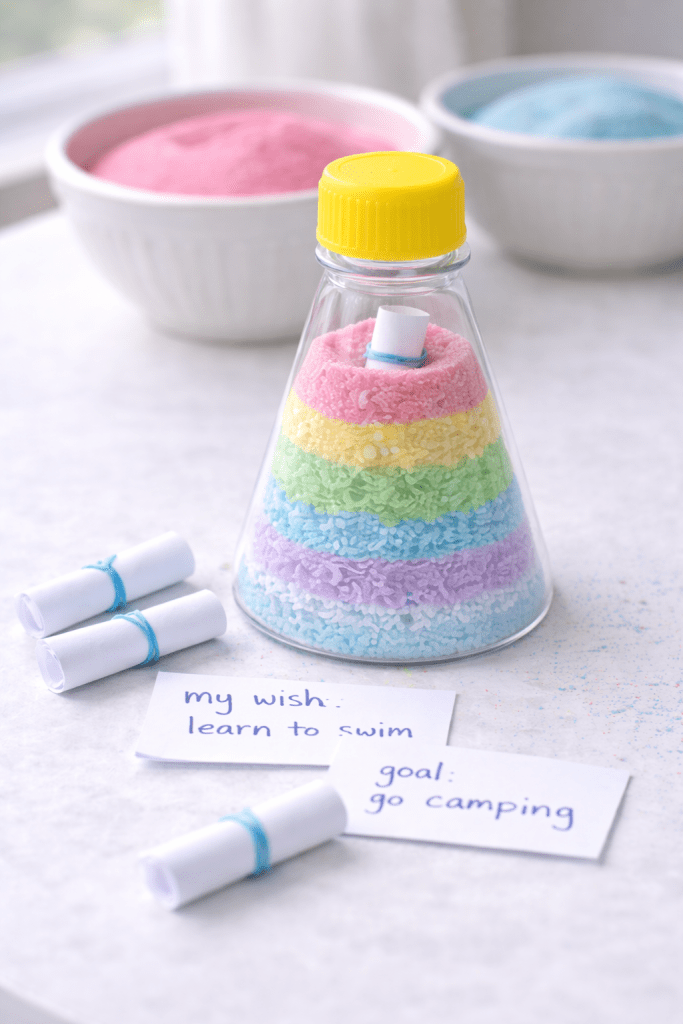
Add Wishes for the Year Ahead
For an extra meaningful touch, set out small pieces of paper and let kids write down a wish or goal for the year ahead.
They can roll it up and tuck it into their jar as they finish, adding something special to look back on later.
To make this even easier (and a little more meaningful), I created a couple simple printables you can use for your setup.
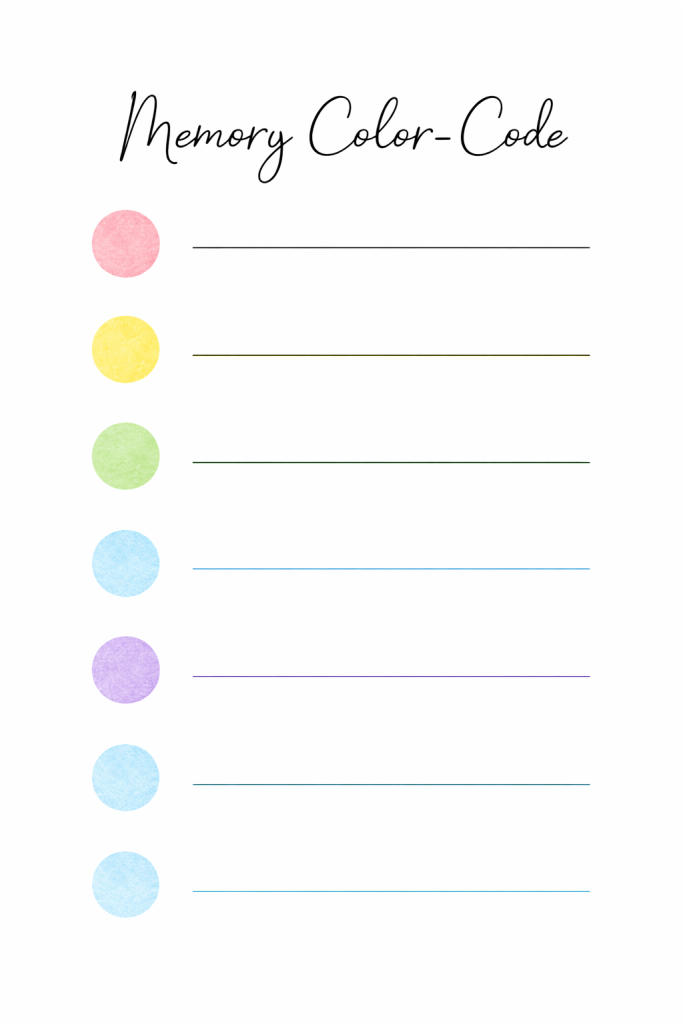
🎨 Color + Memory Planner
This printable lets kids choose what each color will represent and write in their own memories.
Set this out at the table so kids can plan their jar as they go.
📄 Memory Ideas List
This printable gives kids simple ideas if they need help deciding what each color can represent.
Place nearby for inspiration or use as a quick reference.
📝 Memory Jar Poem
You can display this poem at the table to tie everything together and make the activity feel extra meaningful.
Print and frame or set out at the table.
This is the kind of activity that works for:
- birthday parties
- classroom parties
- family nights
- or even graduation
In this post you’ll learn:
- A super easy set up
- A DIY homemade version
- A Pinterest-style decorating station
Jump To Your Favorite Version
The Simple Way (Buy a Kit)
If you want something quick and completely stress-free, a sand art kit is the easiest option.
Everything comes ready to go—just open it up and let the kids start creating. This is perfect for younger kids or if you don’t want to prep anything ahead of time.
You can assign colors ahead of time or let kids choose what each color represents to them.
Examples:
- Pink = friends
- Blue = sports or activities
- Yellow = favorite moments
- White = hopes for the next year
This simple step turns the activity into something they’ll actually keep and remember.
How to set it up:
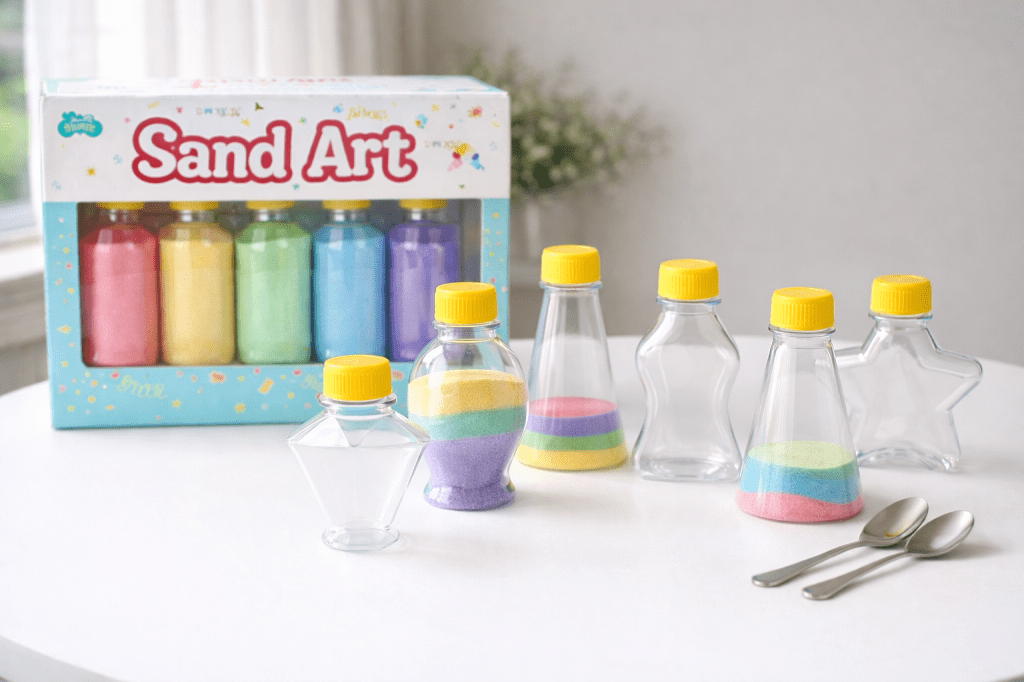
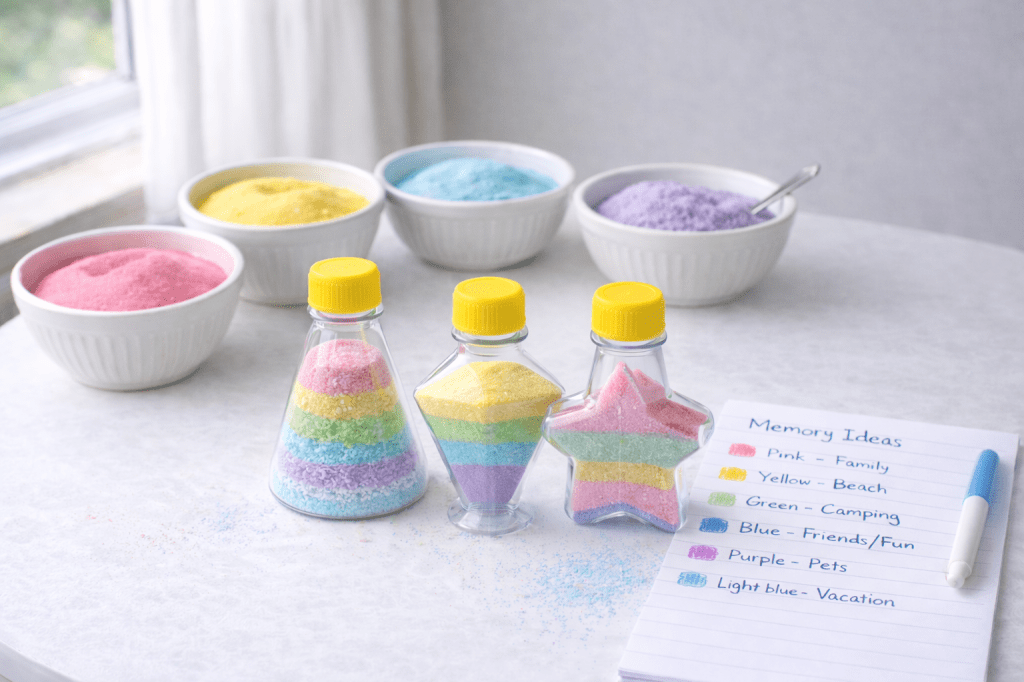
Supplies for Easy Sand Art Party:
- Sand art kit (includes sand, bottles, and funnel)
- Small bowls (unless kit includes a way to distribute sand)
- Optional: tablecloth for easy cleanup
Start by pouring each color of sand into small bowls or containers so everything is easy to see and reach. Arrange them in the center of your table to create a simple “station” where kids can move around and choose their colors.
Set out jars along with funnels, scoops, or spoons to make layering easier (and a little less messy). If you’re using printables, place the memory ideas list nearby so kids can decide what each color will represent as they go.
Once everything is set up, let them create at their own pace. There’s no right or wrong way to do it, and each jar will turn out completely unique
The DIY Way: Make Your Own Sand Art Kit
If you want to keep things extra affordable (and a little more hands-on), you can easily make your own colored sand at home.
This option is great if you have a larger group or want to turn part of the prep into another fun activity.
Supplies for a DIY sand art:
• Table salt
• Sidewalk chalk (variety of colors)
• Ziploc bags
• Jars with screw on lids (we like these too)
• Spoons
• Paper to create funnels
Start by placing a piece of chalk in a Ziploc bag and gently crushing it into a fine powder using a rolling pin or the back of a spoon.
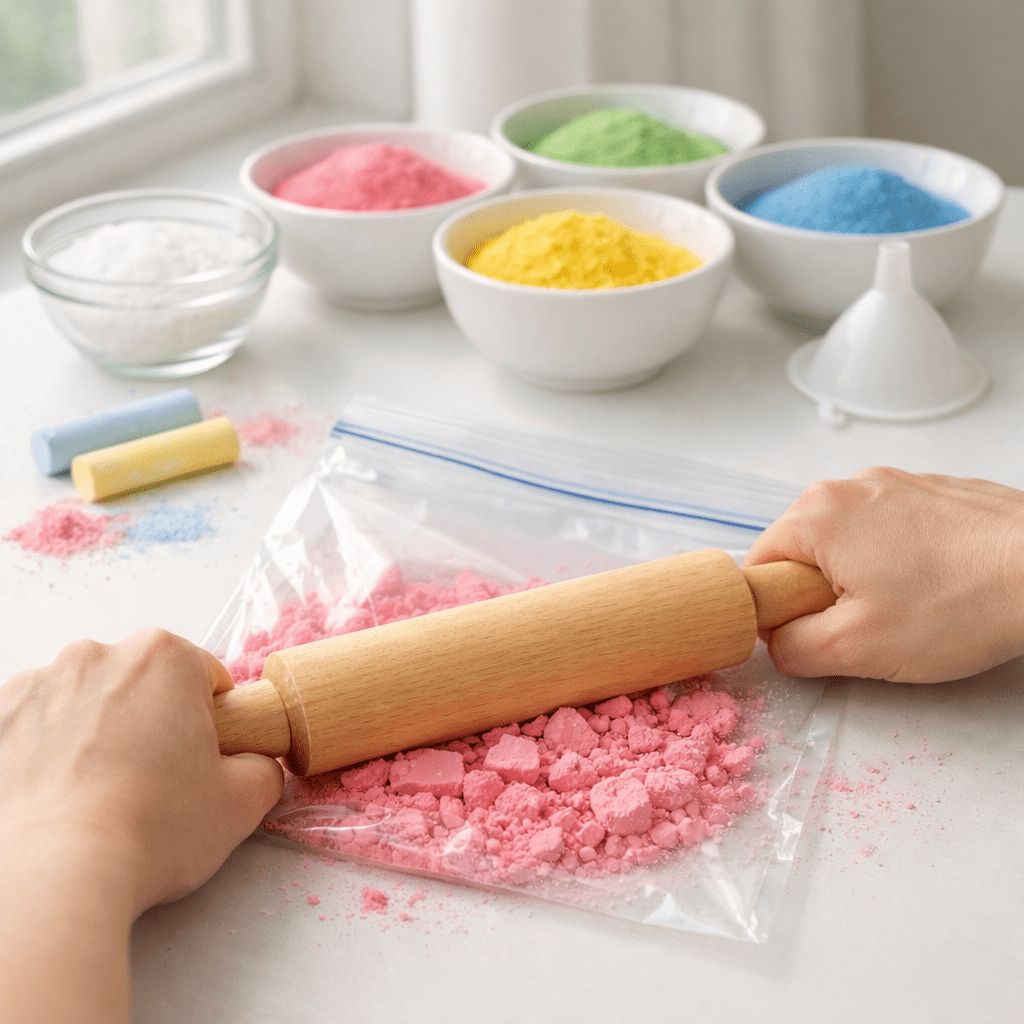
Tip: If you have an electric grinder (for non-food use), this makes the process much faster and gives you a finer, more even color.
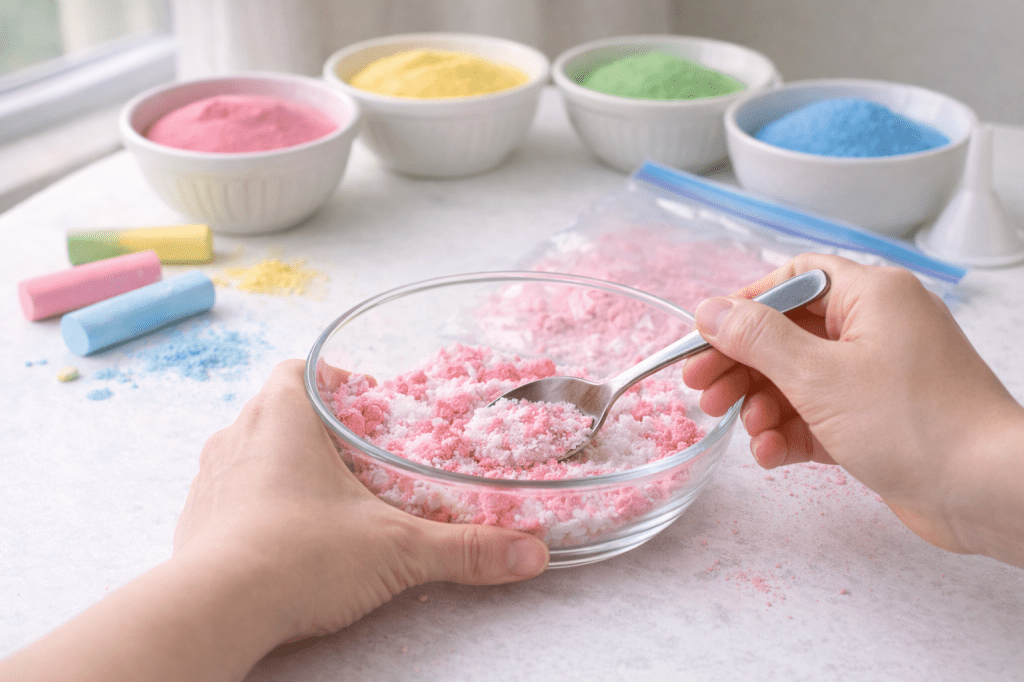
Once the chalk is fully ground, add salt to the bag and shake or mix until the color is evenly spread. You can add more chalk powder if you want a brighter color.
Repeat with different chalk colors to create a variety of shades, then pour the colored salt into bowls or small containers. Set them out on the table along with spoons so kids can easily layer their sand without making a mess.
You can also place your memory ideas list nearby so they can decide what each color represents as they create their jar.
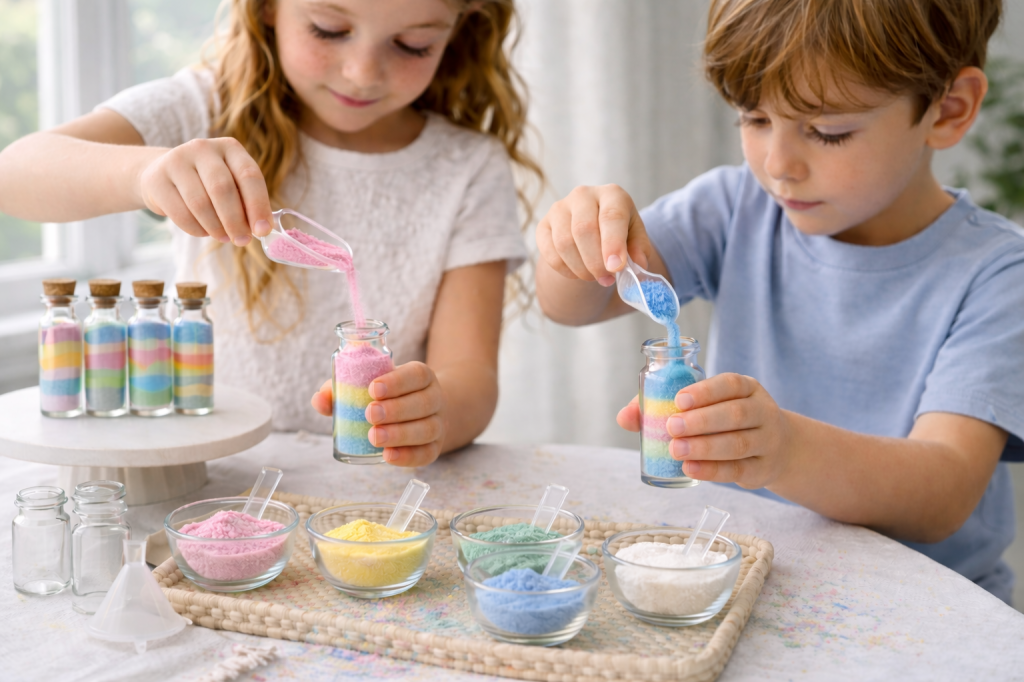
The Party Pro Way: Sand Art Station
If you want a setup that looks extra cute (and totally Pinterest-worthy), this option is all about presentation.
Using pre-colored sand and a few simple upgrades can make the whole table feel more styled while still being easy to pull together.
Supplies for a Party Pro Sand Art Station:
- Pre-colored craft sand
- Clear jars we like these, these, and these
- Small bowls or jars for each color
- Scoops (these clear ones are great too)
- Tray, riser, or cake stand (optional, for height)
- Table cloth
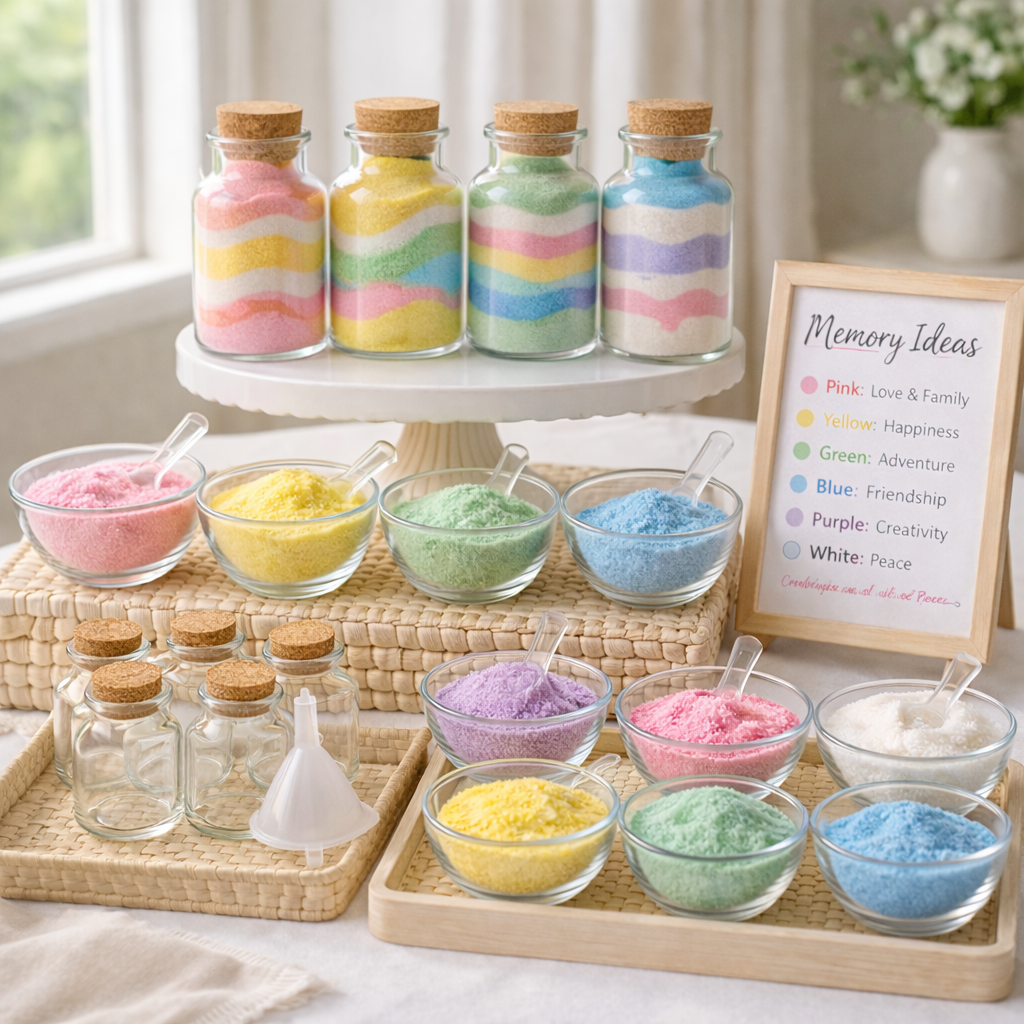
Pour each color of sand into matching bowls or jars and arrange them on a tray or across the table to create a clean, organized look. Using a few different heights—like a small cake stand or box underneath—can make the setup feel more styled without extra effort.
Set out glass jars along with funnels or scoops so kids can easily layer their colors. Keeping everything neat and simple helps the colors stand out and makes the whole station feel a little more special.
Place your memory ideas list nearby so kids can choose what each color represents as they build their jar. This adds a meaningful touch while still keeping the activity fun and creative.
As the jars fill up, so do the memories. This simple activity turns moments from the year into something kids can see, hold, and look back on.
Whether they’re remembering favorite days, big milestones, or little things that made them smile, each layer tells part of their story. So go ahead, create and celebrate their year!

Leave a comment