If you’re looking for a summer activity that keeps kids busy and actually keeps them excited, this backyard gem mining activity for kids is a total win.
Kids get to dig, sift, and discover hidden “gems” just like real miners—which means hands-on fun, a little mess (the good kind), and built-in excitement as they uncover each surprise. And the best part? They’re not just playing; they’re also learning about rocks and minerals along the way.
What makes this activity even better is that you can do it your way.
Whether you need something you can set up in two minutes, want a fun DIY project, or love creating a more styled, picture-perfect setup, there’s an option here for you. No stress, no complicated prep, just simple summer fun that feels a little bit magical.
Below, I’m sharing three easy ways to create a gem mining activity at home, so you can pick what works best for your time, budget, and energy level. Save this for your next summer activity!
*This post may contain affiliate links. As an Amazon Associate, I earn from qualifying purchases.
In this post, you’ll learn:
- A super easy setup
- A DIY homemade version
- A Pinterest-style decorating station
Jump To Your Favorite Version
The Simple Way (Use What You Have)
If you want something quick, easy, and zero stress, this is the way to go.
All you need to do is grab a gem kit, hide the gems, and let the kids dig in. It takes just a few minutes to set up, but keeps kids entertained way longer.
Supplies for a Simple Gem Mining Activity:
- Sandbox, dirt pile, or large bin/tote
- Sand (if needed)
- Gems
- Scoops, sifters, cups, or small shovels
- Optional: bucket or bag for collecting “treasures”
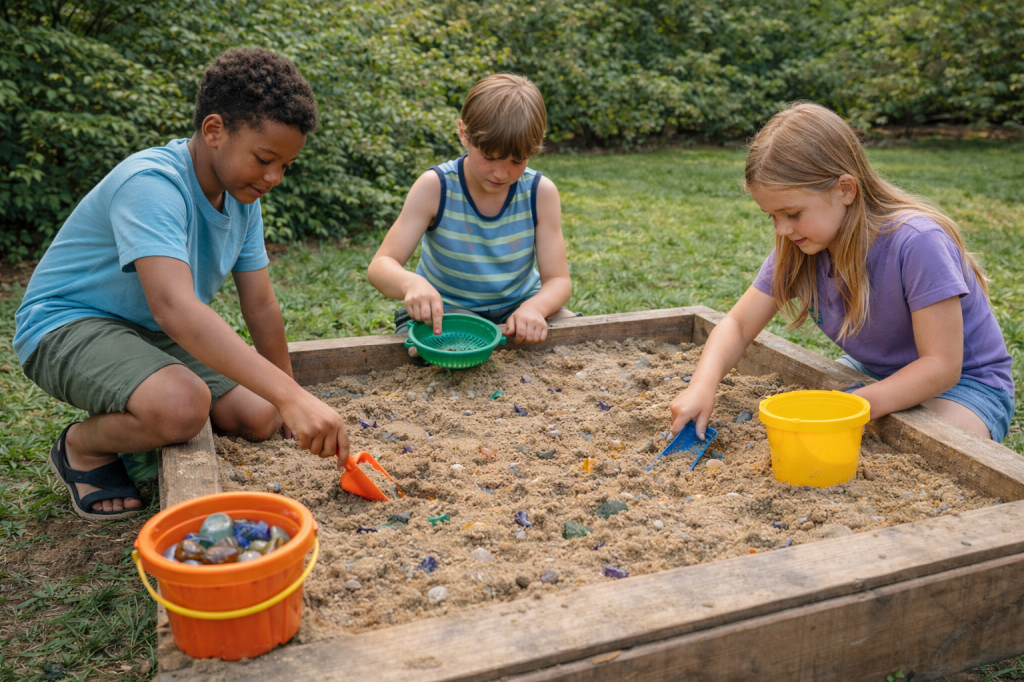
Here is an example of a simple set up.
How to Set It Up:
Start by choosing your “mining area.” If you already have a sandbox, you’re set. If not, no problem—just pour a bag of sand into a large tote, bin, or even a cardboard box. You can also use a small dirt pile for a more natural feel.
Scatter the gems throughout the sand or dirt, burying some deeper and leaving a few closer to the top for easy finds (this keeps kids engaged right away).
Set out scoops, sifters, and small tools so kids can dig, pour, and search just like real miners.
How Kids Play:
Kids dig, scoop, and sift to uncover hidden “treasures.” Some will carefully search, while others will go all in, both ways make it fun.
As they collect rocks and gems, you can casually talk about colors, textures, and different types of rocks, turning it into a simple, hands-on learning activity without any extra prep. We linked to a gem activity kit that we love because it comes with an identifying chart so kids can go match the gems they find to the chart and learn exactly what they are.
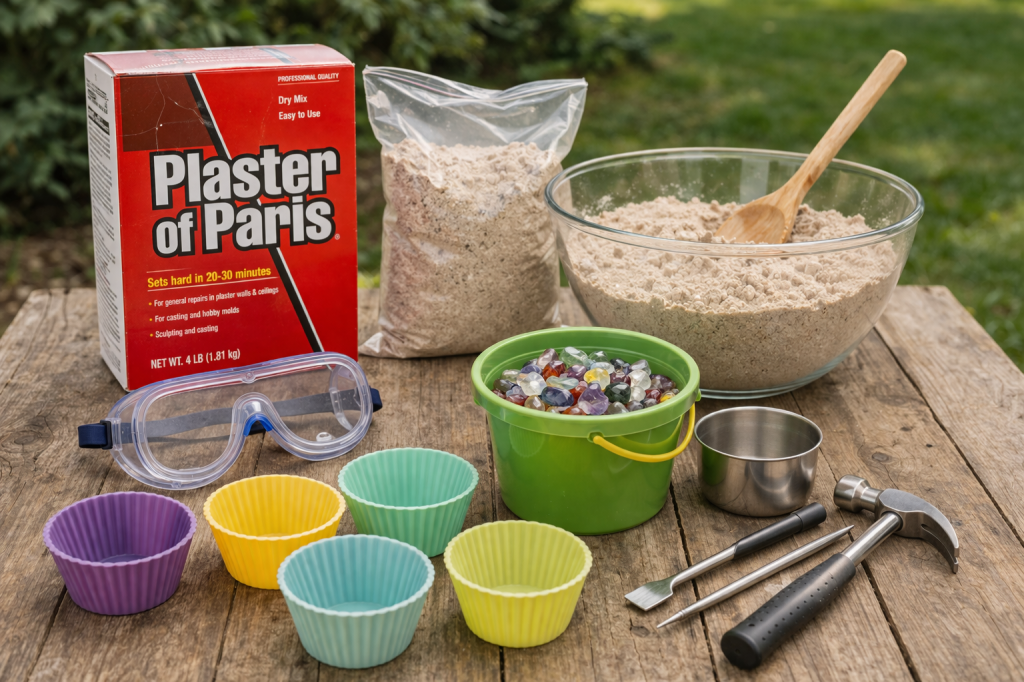
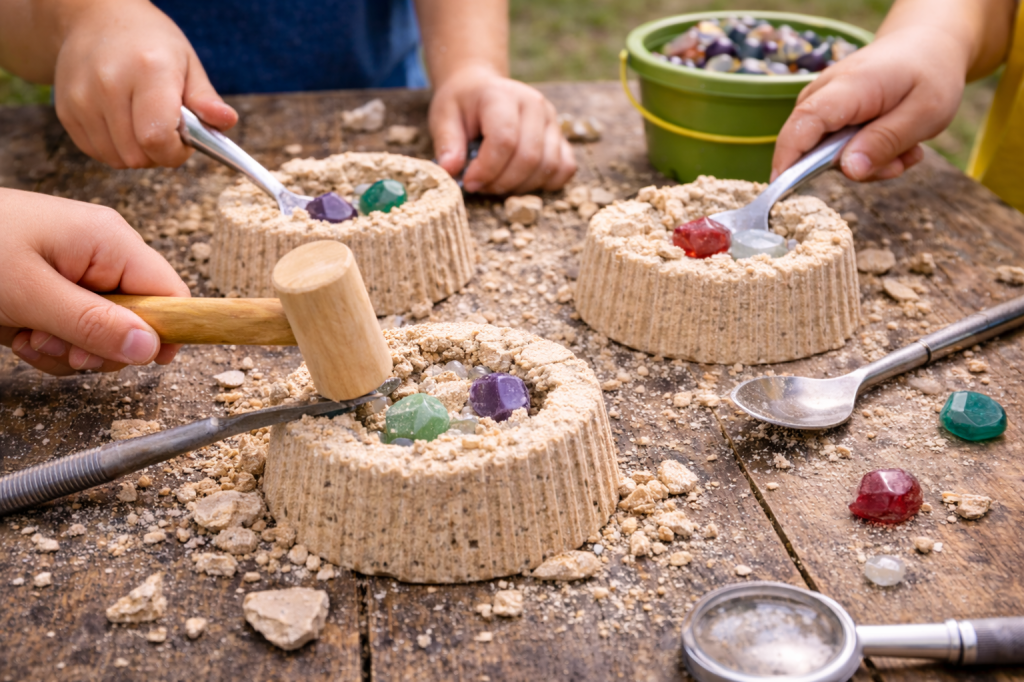
The DIY Way: Make Your Gem Dig
If your kids love hands-on projects, or you want something that feels a little more like a real mining experience then this DIY version is such a hit.
Instead of just digging in sand, kids actually chip away at hardened blocks to uncover hidden gems, just like real geologists. It adds a whole new level of excitement and keeps them engaged longer.
Supplies for a DIY gem mining blocks:
- Plaster of Paris
- Sand
- Water
- Gems
- Molds
- Hammers, chisels
- Optional: safety goggles
How to Make Gem Mining Blocks:
One of the biggest mistakes with DIY gem mining blocks is making them too hard. If there’s too much plaster, kids end up frustrated trying to break them open.
For a block that’s fun to dig (not frustrating), use this simple ratio:
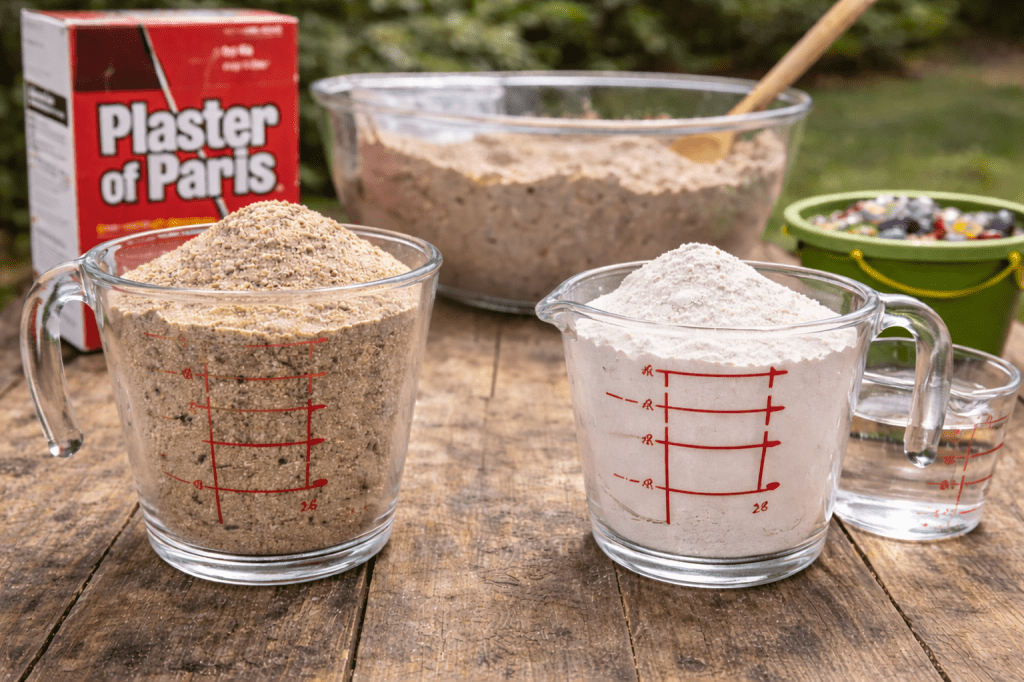
Best Ratio for Kids:
- 2 parts sand
- 1 part plaster of Paris
- Water (added slowly until it’s a thick, scoopable consistency)
This creates a block that holds its shape but is still easy enough for kids to chip and break apart.
Next, place a scoop of mixture in the bottom of the mold. Add a gem or two then completely cover with more mixture. Repeat to all molds or as many as you want. Let dry overnight. Remove from molds at set up play.
Quick Tips for Success:
Too much water? It may turn out crumbly or take longer to dry Want it softer? Add a little more sand Want it harder? Add a little more plaster

How Kids Play:
Give each child a block along with tools like small hammers, chisels, or even sturdy spoons.
Kids can tap, chip, and break apart their blocks to reveal the hidden gems inside. It feels like a real discovery, which makes it extra exciting. If you order the kit we linked too in supplies, then make sure to hang the poster so once gems have been mined the kids can identify what they have found. Alternate options are to hide the dig in a certain area of even in a sand box. First the kids have to find the clumps then excavate the gems. Always fun to sprinkle a few loose gems around as well.
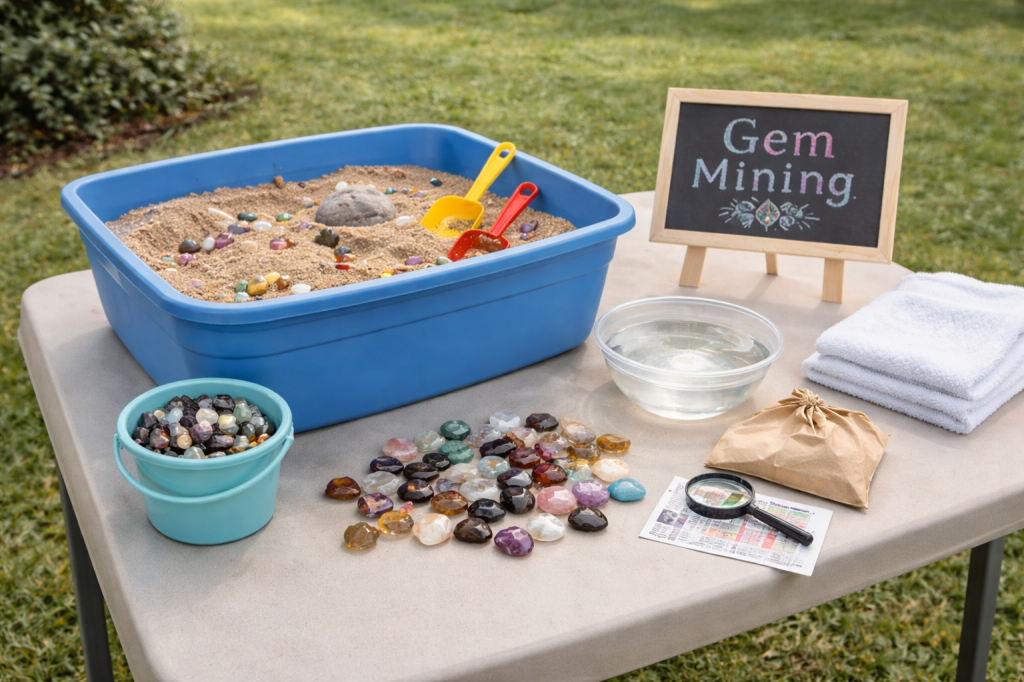
The Party Pro Way: Gem Mining Station
If you enjoy adding a few extra touches, this version is such a fun option.
Starting with pre-made gem mining kits keeps prep simple while still creating a really fun, hands-on experience for kids.
Supplies for a Party Pro Gem Mining Station:
- Pre-made gem mining kits (this one has 12)
- Large bin, table, or wooden box for the “mining area”
- Sand (to create a digging base)
- Small shovels, scoops, or sifters
- Small bags or containers for collecting gems
Optional
- Small Gems (this kit is awesome!)
- Towels for drying hands
- Kraft paper, trays, or baskets for a more styled setup
- Small signs or labels (like “Gem Mining”)
- Bowls or a water table for rinsing gems
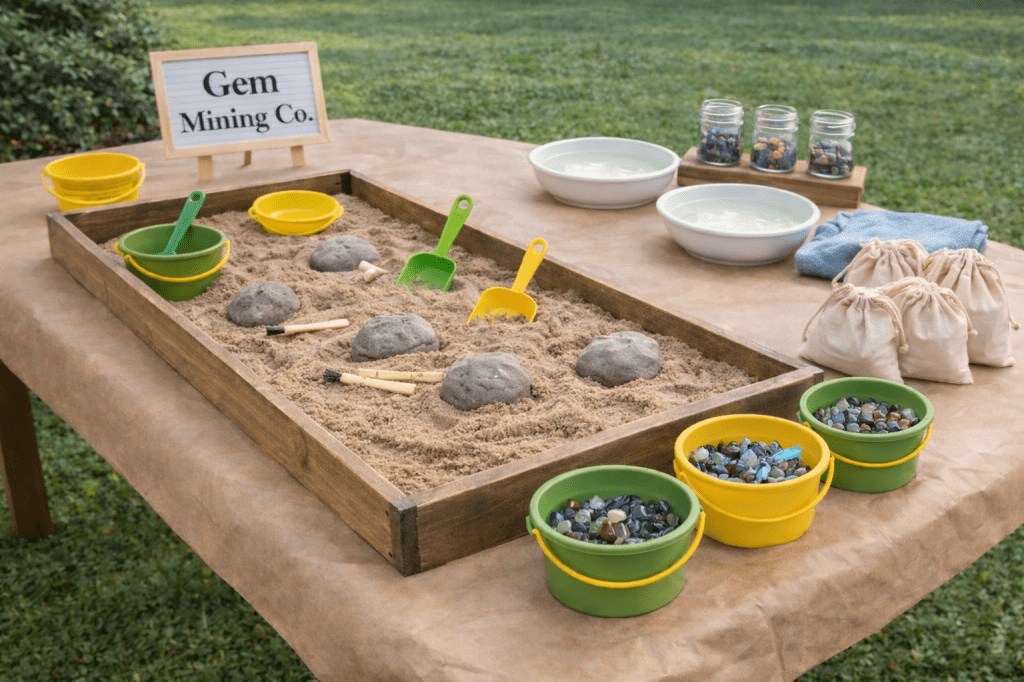
How to Set Up:
Start by creating your mining area. A long wooden box, large bin, or even a sectioned-off table works great. Fill it with sand and place your gem mining kits or blocks throughout so kids can dig and discover.
Set out scoops, sifters, and small tools along the edge so everything is easy to grab. Spacing them out a bit helps avoid crowding and keeps things running smoothly.
Next, create a simple rinse station nearby using bowls of water or a small water table. This is where kids can wash off their gems after they find them, and it’s always a favorite part.
Add a spot for collecting treasures with small bags, buckets, or containers. You can place these at the beginning so kids grab one before they start digging.
If you want to elevate the look sprinkle some extra gems around the dig area. Check out the kit we linked to, It’s from National Geographic and includes an identifying chart, which makes it fun for kids to learn more about the gems they find. Get the supplies now so you are ready to start digging!

Leave a comment