If you’re looking for a party activity that keeps kids busy and actually keeps them excited, this make your own chocolate bar party is a total win.
Kids get to melt, mix, and create their own chocolate bars just like a real candy shop. There’s something about choosing toppings, watching the chocolate set, and designing their own wrapper that makes this feel extra special. It’s hands on, a little messy in the best way, and full of those fun “look what I made” moments.
And the best part is you can do it your way.
Whether you need something you can throw together quickly, want a fun DIY version with molds and mix ins, or love creating a full chocolate factory experience where kids make and wrap their own candy bars, there’s an option here for you. No stress, no complicated prep, just a fun activity that feels a little bit magical. This make your own chocolate bar party is perfect for birthdays, playdates, or anytime you need an easy activity kids will love. They even make great gifts for kids to give.
Below, I’m sharing three easy ways to create your own chocolate bar station at home, so you can pick what works best for your time, budget, and energy level. Save this for your next party or rainy-day activity.
*This post may contain affiliate links. As an Amazon Associate, I earn from qualifying purchases.
In this post, you’ll learn:
- A simple no mold version
- A DIY chocolate bar setup with mix ins
- A Pinterest-style chocolate factory experience
Jump To Your Favorite Version
The Simple Way (No Mold, No Stress)
If you want the easiest way to do a make your own chocolate bar party for kids, this is it. No molds, no special tools, and almost no prep. It’s quick, fun, and still gives kids that “I made this!” excitement.
Supplies:
- Milk chocolate melting wafers (easy to melt + no guesswork)
- Parchment paper
- Baking sheet
- Sprinkles or 1 to 2 toppings (mini M&Ms, crushed cookies, sprinkles etc.)
How to make it:
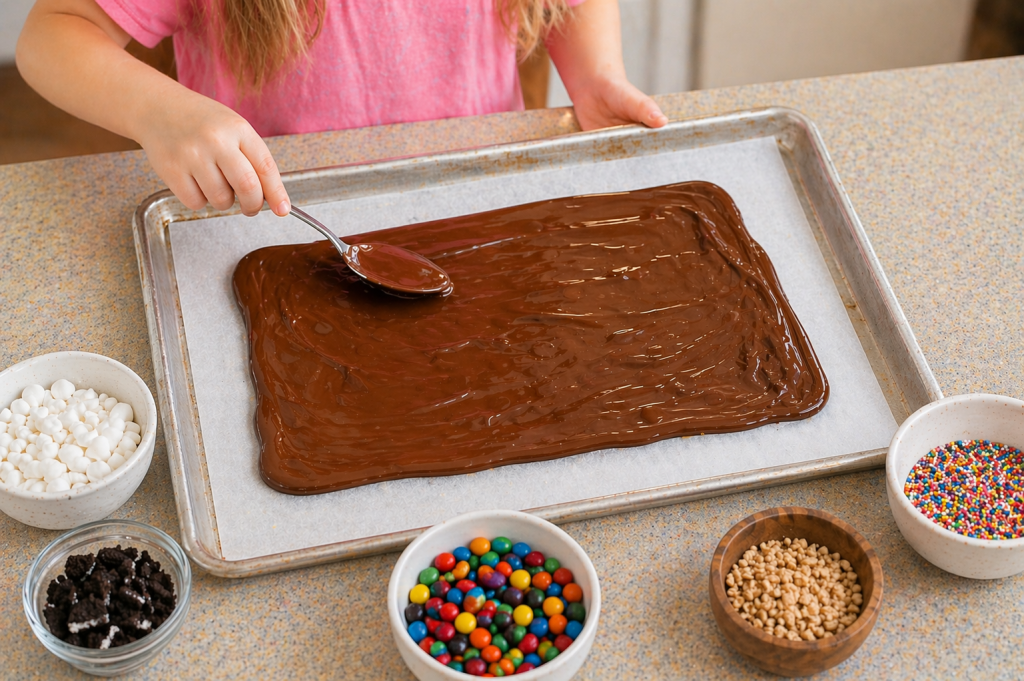
Start by lining a baking sheet with parchment paper.
Melt your chocolate in the microwave in 20 to 30 second intervals, stirring in between until smooth. Be careful not to overheat since chocolate melts quickly. You can also use the double boiler method if you prefer.
Pour the melted chocolate onto the parchment paper and spread it into a thin layer using a spoon or spatula.
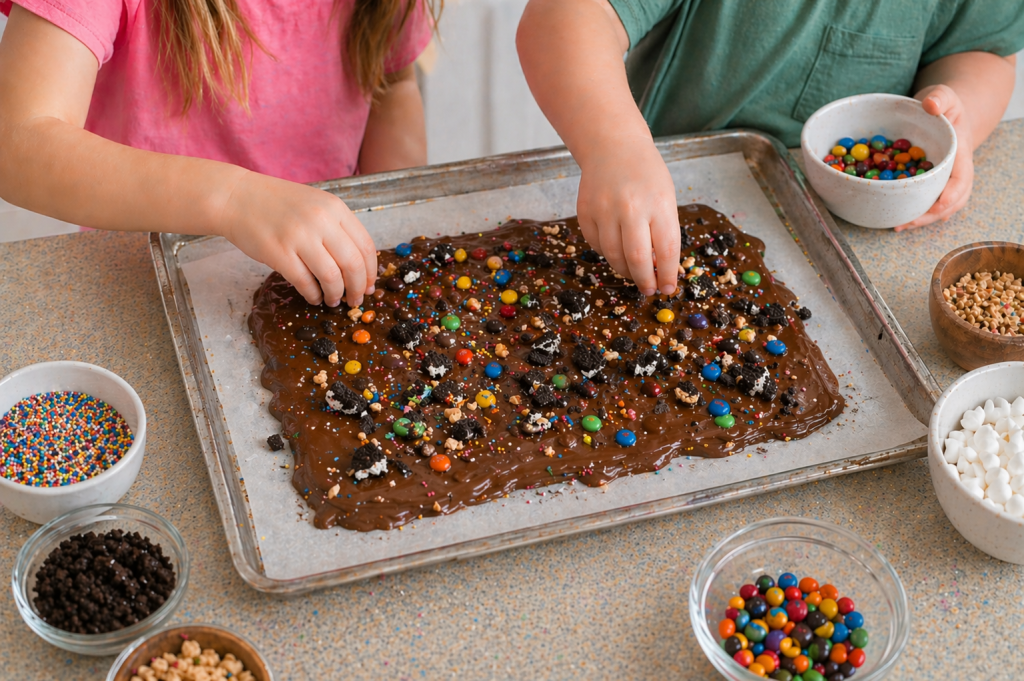
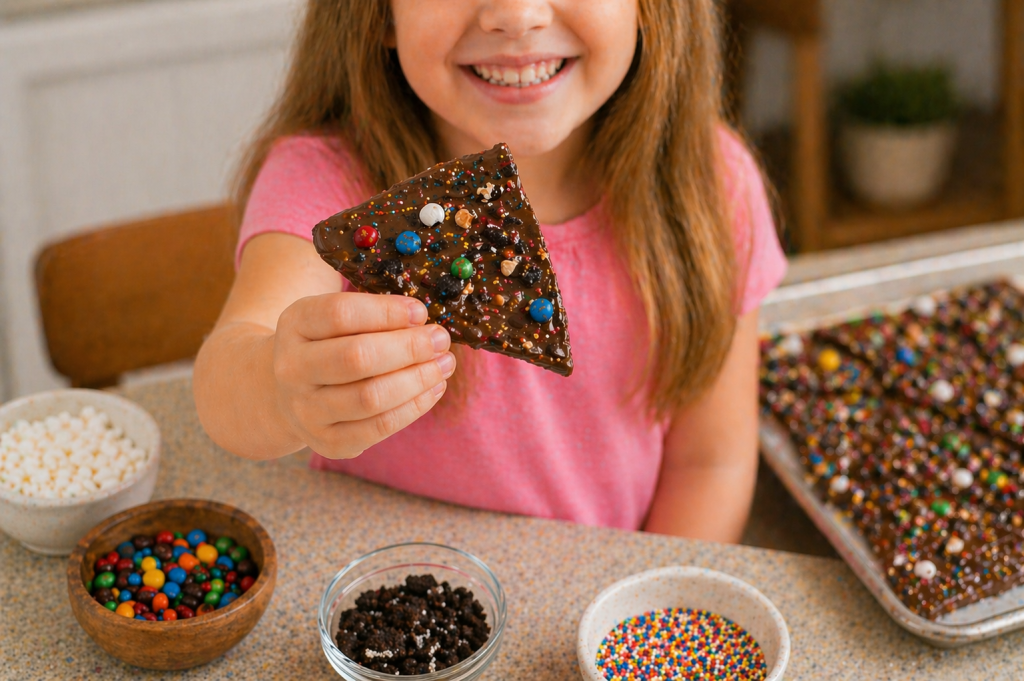
Let kids add their toppings right away while the chocolate is still soft. Keep it simple with just a few options so it doesn’t get overwhelming.
Place the tray in the fridge until the chocolate is set. Once it’s firm, break it into pieces and serve.
Why this works:
This version is perfect when you need a quick and easy chocolate bar activity with kids. There’s no pressure to make perfect shapes, and cleanup is minimal. It’s a great option for younger kids or last minute parties when you still want something fun and hands on.
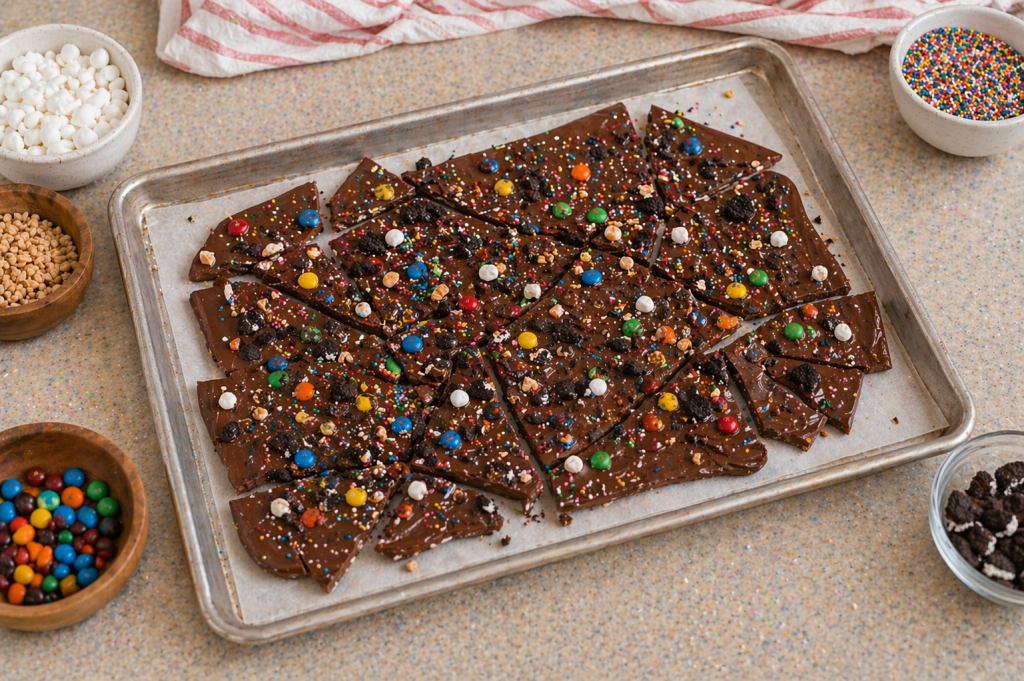
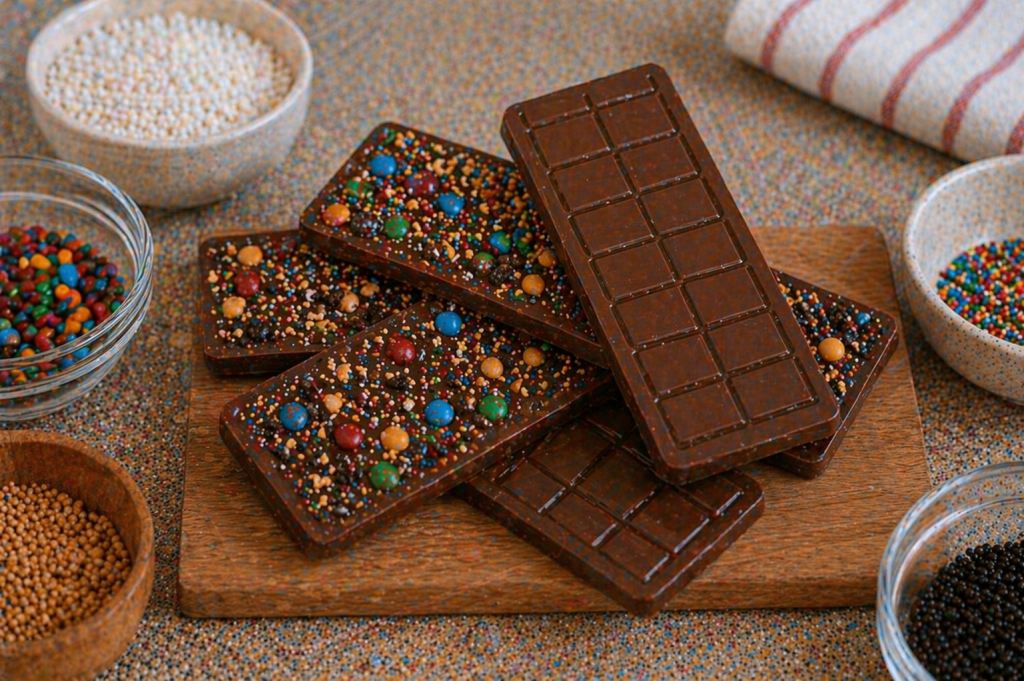
The DIY Way: Create Your Own Chocolate Bars
This is where a make your own chocolate bar party really starts to feel like a real candy making experience. Using molds and fun mix-ins, each chocolate bar turns out a little different, which is part of what makes this so fun.
Kids can choose their favorite toppings, layer them into the chocolate, and watch their ideas come to life in real chocolate bar shapes. It’s hands on, creative, and perfect for kids who love to mix, pour, and experiment.
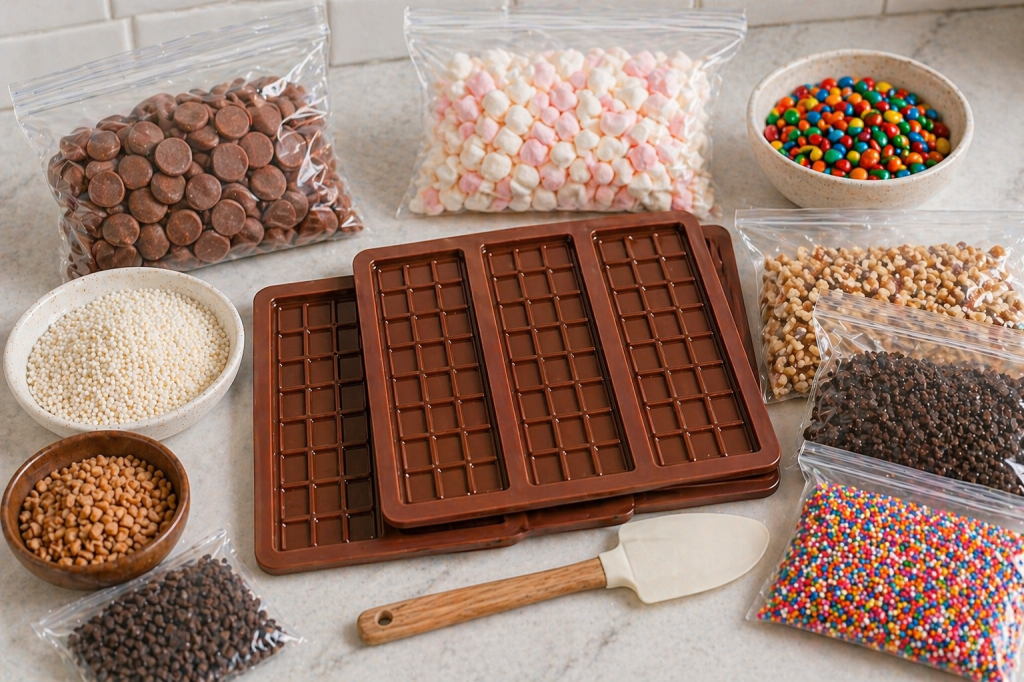
Supplies:
- Milk chocolate melting wafers (easy to melt + no guesswork)
- Silicone chocolate bar molds (these make it feel like real candy bars). Here are individual ones, these are crazy cool!
- Mix-ins (mini M&Ms, crushed cookies, marshmallows, nuts, sprinkles)
- Spoon or small spatula
How to make it:
Start by melting your chocolate in the microwave in 20 to 30 second intervals, stirring in between until smooth. Be careful not to overheat. A fail proof way is to use a chocolate melter, we love this one!
Place your silicone molds on a flat surface or baking sheet to make them easier to move. Pour the melted chocolate into each mold, filling it about halfway or slightly more. Let kids add their mix-ins on top.
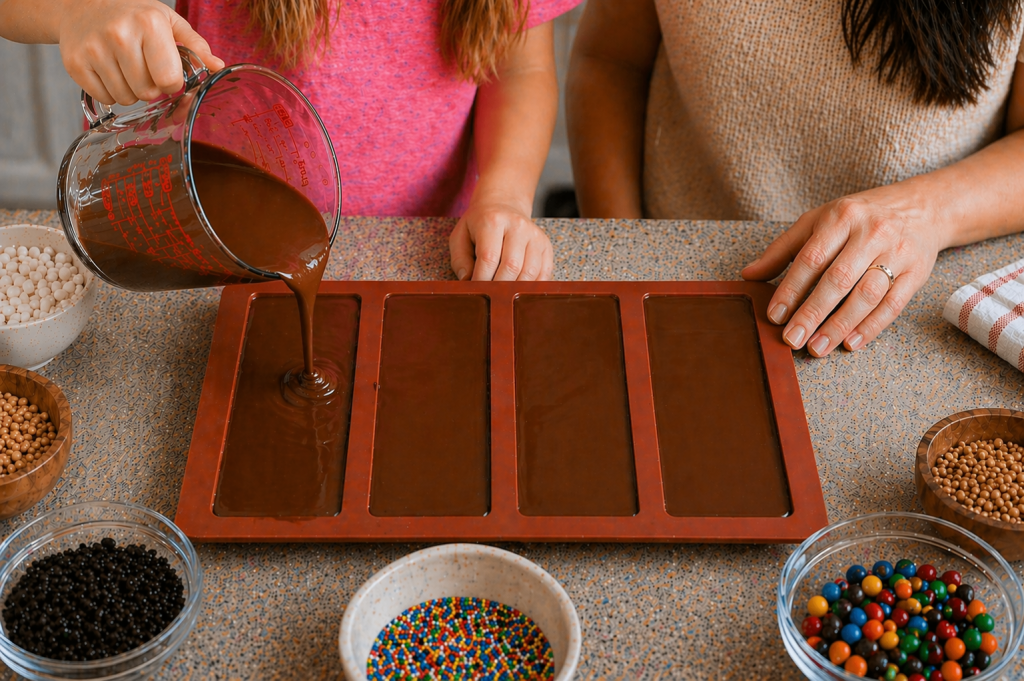
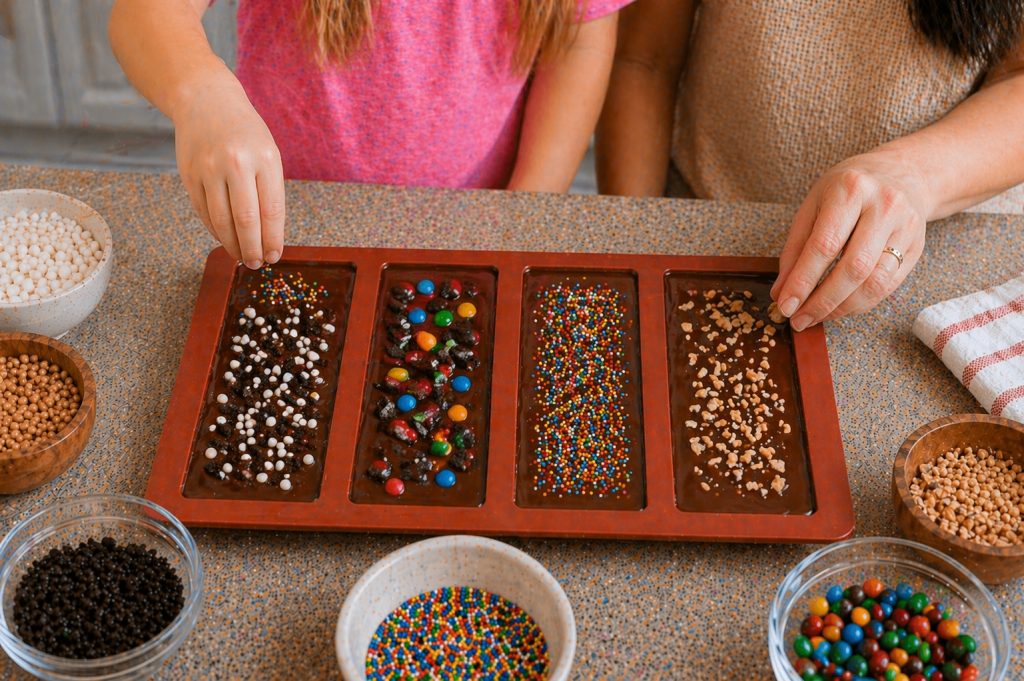
You can gently press toppings into the chocolate, so they stick. If you want a more filled chocolate bar, you can add a little more melted chocolate on top to seal everything in. Place the molds in the fridge until fully set. Once firm, pop the chocolate bars out of the molds.
Why this works:
This version gives kids a fun way to create their own chocolate combinations while still keeping things simple to set up. It’s a great option for parties, playdates, or anytime you want an easy activity that feels a little extra creative.
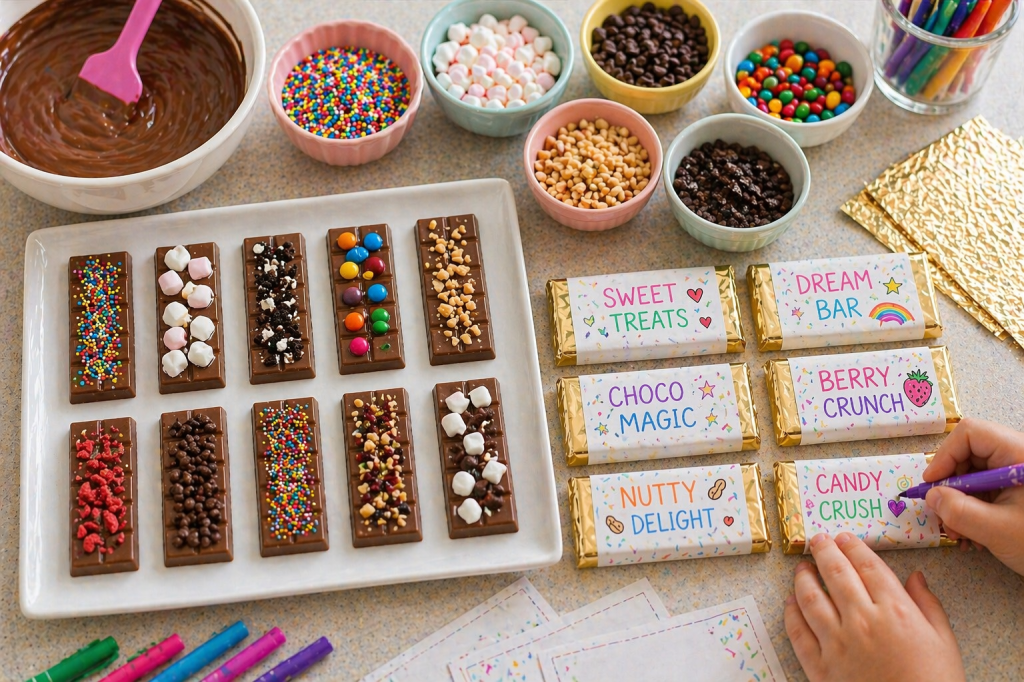
The Party Pro Way: Chocolate Factory Party
This version turns your chocolate bar activity into a full chocolate factory experience. Kids don’t just make chocolate bars, they create, wrap, and design their own “brand” just like a real candy shop.
It’s hands on, creative, and doubles as both an activity and a take home favor, which makes it perfect for parties or special celebrations.
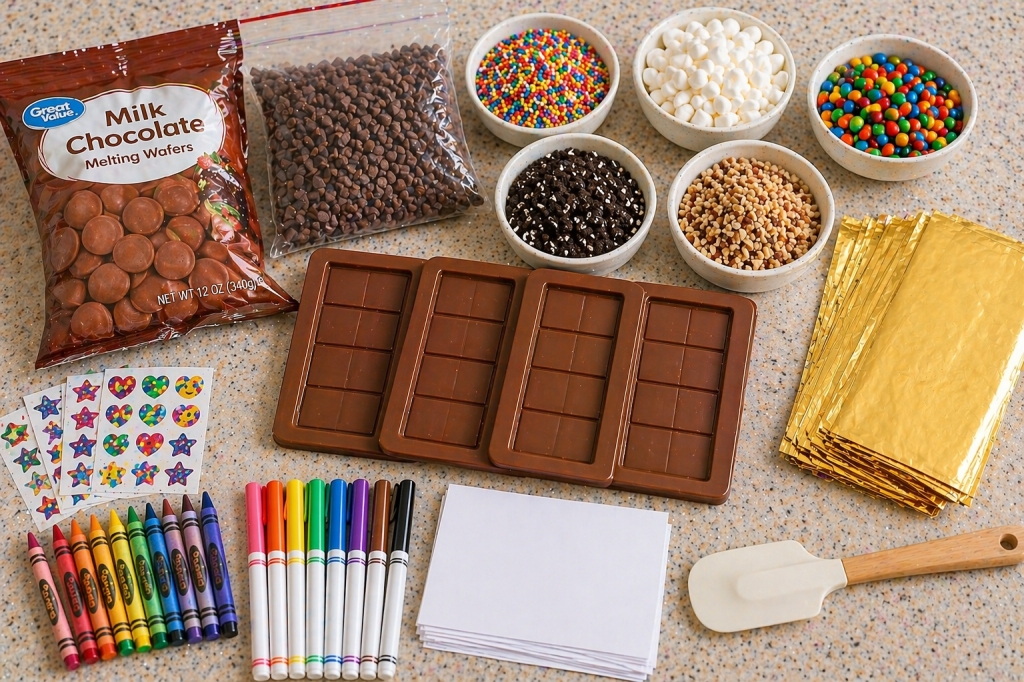
Supplies:
- Milk chocolate melting wafers (easy to melt + no guesswork)
- Silicone chocolate bar molds, here are individual ones, these are crazy cool!
- Mix-ins (sprinkles, candy, crushed cookies, nuts)
- Gold foil candy wrappers
- Plain copy paper (cut to fit bars a common size is 5.25 inches x 6 inches but it depends on your mold)
- Markers or crayons
- Stickers (optional)
How to set it up:
Start by making the chocolate bars just like the DIY version. Let kids pour, decorate, and create their own combinations. Once done, place in the fridge until set.
While waiting for chocolate to set, let kids decorate their wrappers with markers, crayons, and stickers. They can name their chocolate bar, design a logo, or even write ingredients on the back. If you are celebrating a special occasion, they can add that, maybe Happy Birthday, #1 Mom, or Best Dad. These can really be used for any occasion.
Once the bars are fully set, carefully remove them from the molds.
Give each child a piece of foil and show them how to wrap their chocolate bar like a real candy bar from a chocolate shop.
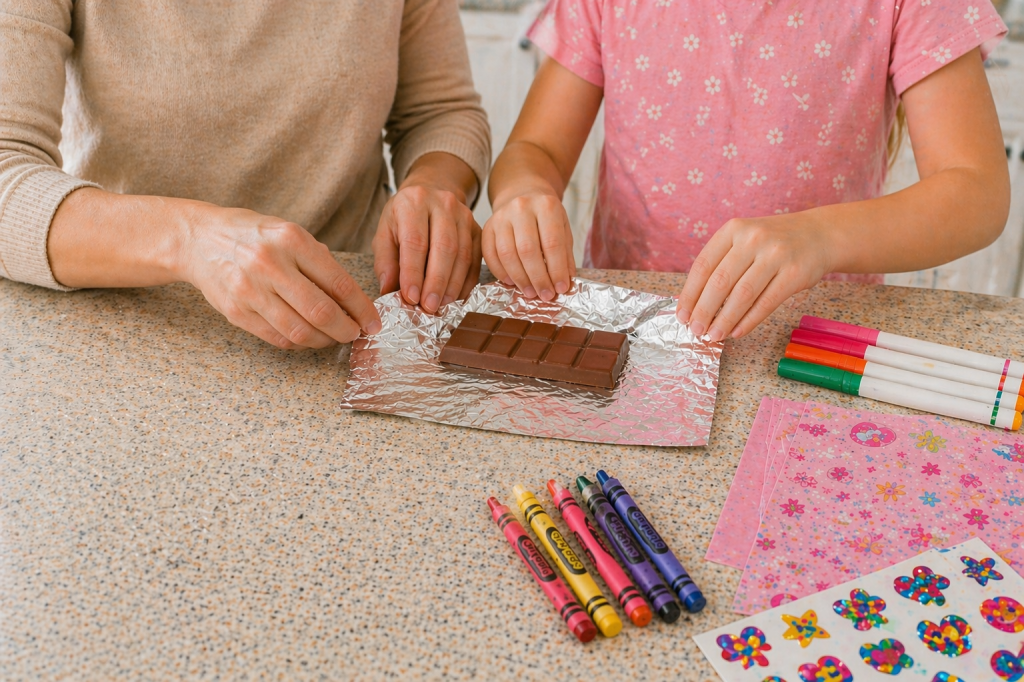

Next, place their personally decorated label around the foil and secure with a piece of tape. Leave the foil ends slightly exposed so it looks like a real chocolate bar wrapper.
Whether you kept it simple, made your own bars, or went all in with a full chocolate factory setup, this is one of those activities kids remember.
They get to create something with their hands, make their own choices, and end up with something they’re genuinely excited about. And you get an activity that’s easy to set up, keeps them engaged, and doesn’t require anything complicated.
It doesn’t have to be perfect. In fact, the more imperfect it is, the more fun it usually is.
🎉 Save This for Later
If this is going on your “we need something fun to do” list, save it so you can come back to it when you need an easy win.

Leave a comment