
Getting kids excited for a new school year doesn’t have to involve an expensive craft or a big mess.
A pencil decorating bar is one of those activities that kids of almost every age enjoy. It works for classrooms, first-day-of-school parties, homeschool groups, scout meetings, library events, or simply as an afternoon activity before school starts.
The best part? Kids get to create something they’ll actually use throughout the school year.
Whether you’re looking for a quick five-minute activity or want to create an impressive decorating station, these three versions make it easy to choose what works best for your group.
Shop The List For All Variations
- Simple: Washi Tape Pencils
- DIY: Personalized Label Pencils
- Party Pro: Pencil Decorating Bar
Jump To Your Favorite Version
Simple: Washi Tape Pencils
Supplies
If you’re decorating with younger kids or need a quick classroom activity, this simple and inexpensive, washi tape version is the perfect place to start. There are no special tools, no drying time, and no artistic skills required. Just peel, wrap, and create!
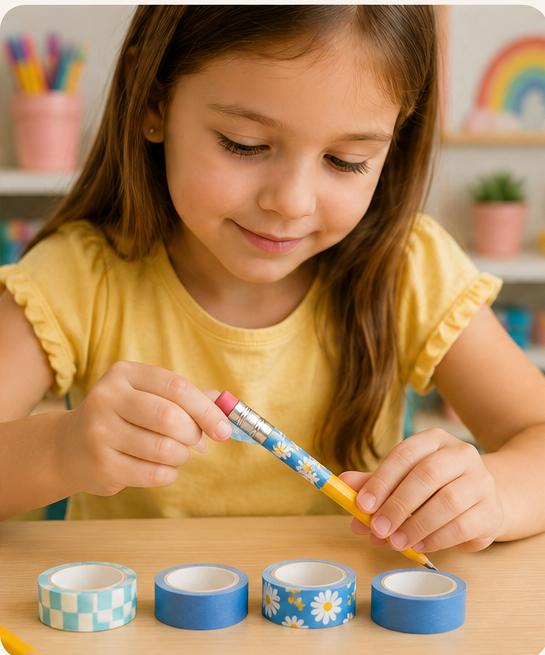
The tape is easy to reposition if they want to change the design, making this a low-stress activity for little hands. You’ll be surprised how something as simple as colorful tape can turn an ordinary pencil into a fun school accessory, they’ll be excited to use. Kids love mixing colors and patterns to make each pencil unique.
Method 1
Start by cutting 2 strips of tape the same size as the pencil from the bottom of the ferrule (metal band) to just above sharpened end. Lay pencil on top of 1 piece and smooth one section of tape around it. Then do the same to the other side. Place second piece of tape over open area and smooth. Once done embellish with more tape.
Method 2
Place the tape directly below the ferrule and make one complete wrap around the pencil and then cut tape. This ensures none of the pencil will peek through the top. Next start again anywhere directly below the ferrule (yes just like you already did), this time spiral the tape down the pencil and smooth as you go.
Method 3
Cut a bunch of smaller strips and wrap the first one around pencil directly below the ferrule. When the first piece is wrapped and smooth grab the next piece and do the same thing directly below the piece you just placed. Continue to the bottom of the pencil.
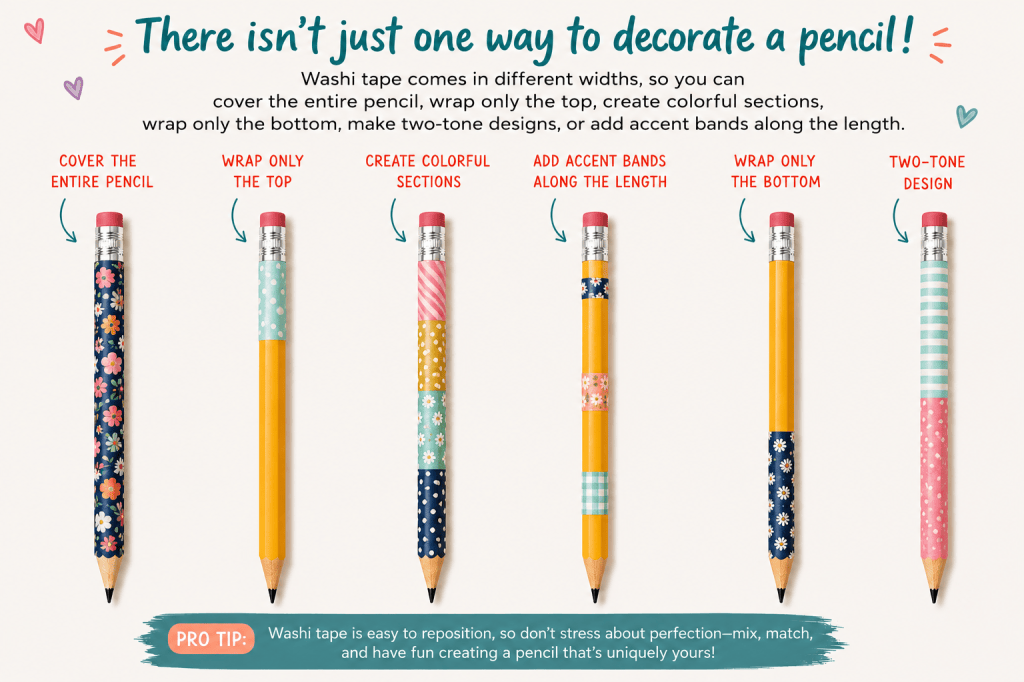
Pro Tip: There isn’t just one way to decorate a pencil! Washi tape comes in different widths, so you can cover the entire pencil, wrap only the top, create colorful sections, or add accent bands along the length. Older kids may be able to spiral wrap the tape down the pencil and keep it smooth.
DIY Personalized Label Pencils
Supplies
- Printable Sticker Paper (this one is waterproof!)
- Pencils
- Washi tape
- Scissors
- Free Printable!
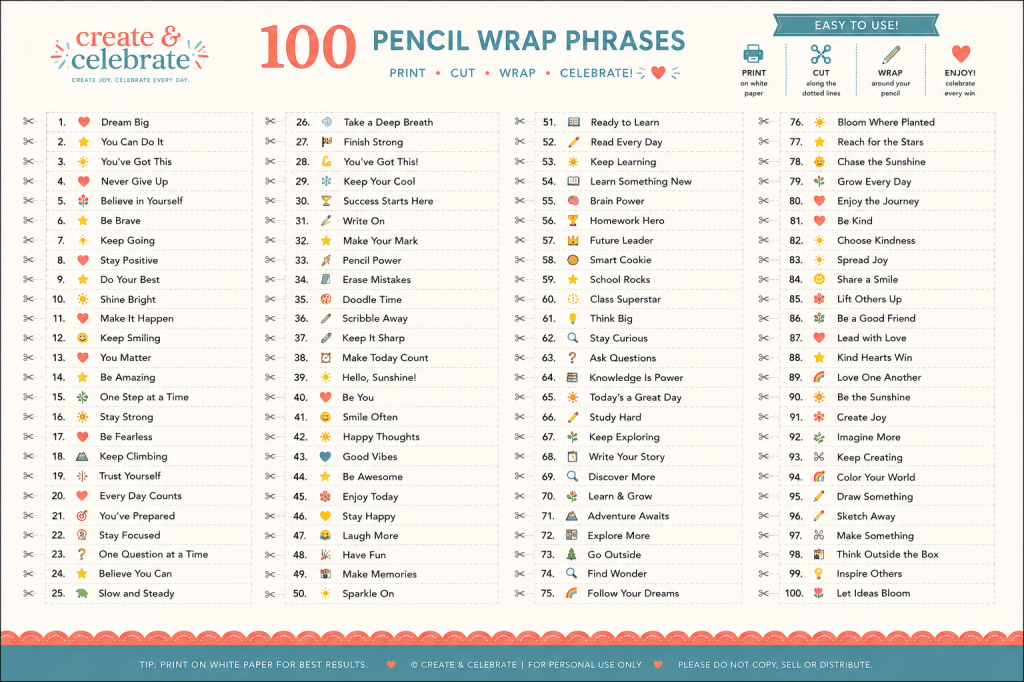
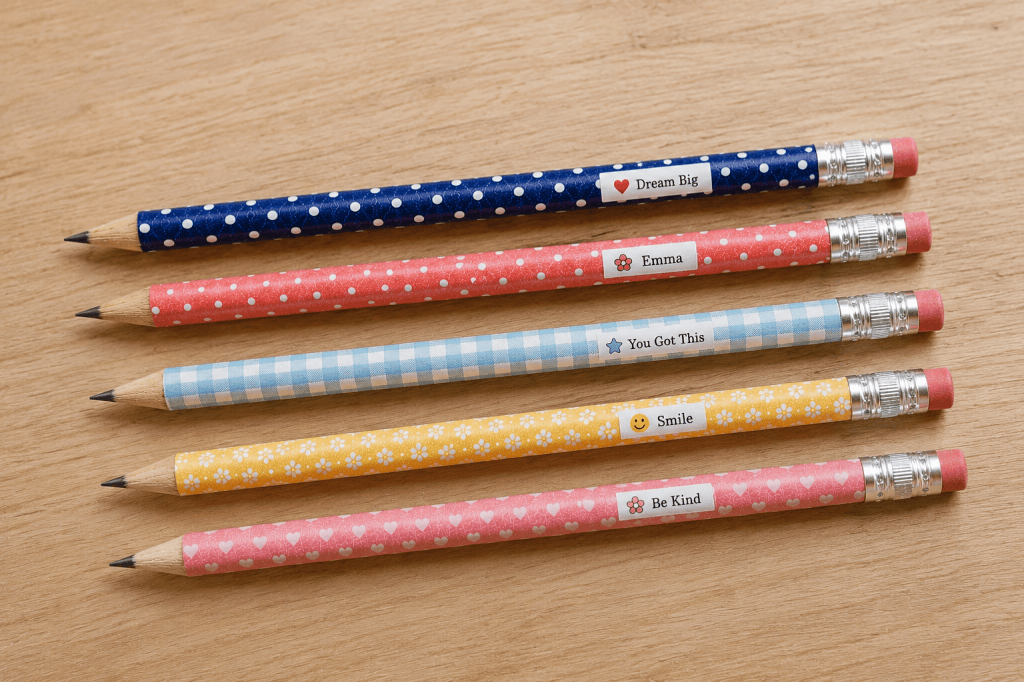
For this version of the craft, kids get to personalize their pencils with their names or short motivational phrases. It’s a simple addition that makes ordinary pencils feel extra special and helps prevent them from getting mixed up at school.
Print Your Own Labels
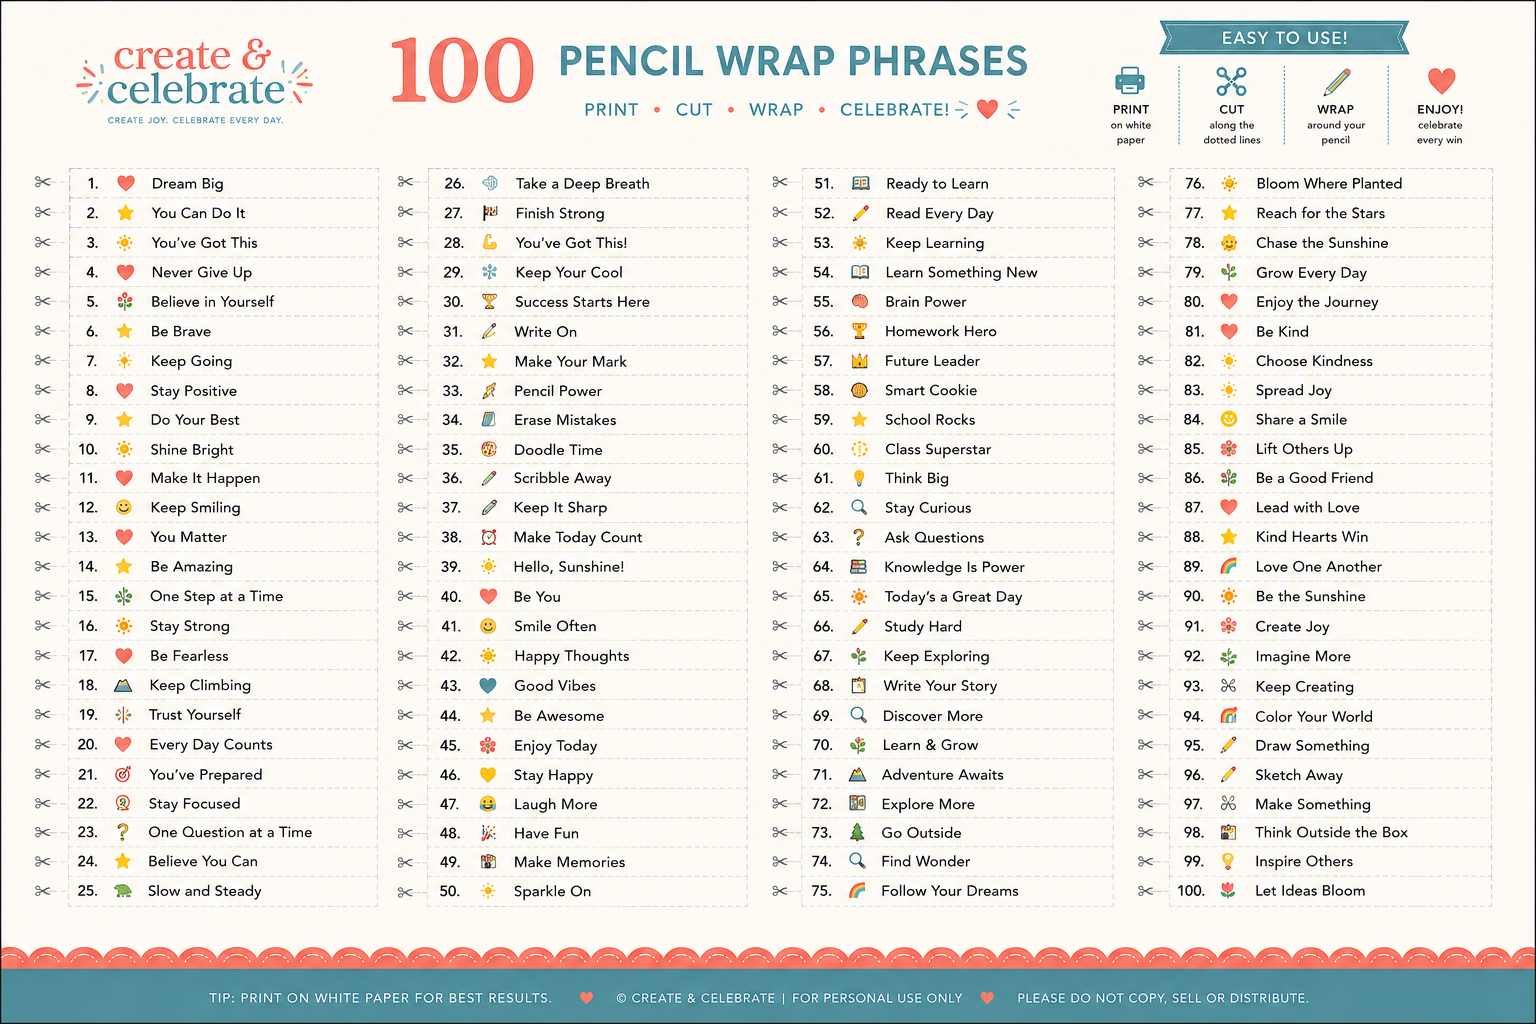
Using a regular printer, type names and phrases so the letters are about ⅛ inch tall, then print them on sticker paper. Cut the words into narrow strips and attach them. Make your own or download ours from the supplies list.
Pro Tip
For the smoothest classroom experience, have all of the names and motivational phrases printed and cut before students arrive. Kids can add the labels after they have decorated with washi tape to make a personalized school accessory.
Party Pro Pencil Decorating Bar
Supplies:
- Washi tape
- Pencil charms
- Silicone bands
- Printable Sticker Paper (this one is waterproof!)
- Pencils
- Scissors
- Free Printable!
Planning a classroom party, back-to-school celebration, or first-day-of-school activity? Turn this craft into a fun decorating station where every child can create a pencil or two or five that’s completely their own.
Arrange your supplies in small bowls, baskets, or divided trays so kids can easily browse the different options and move from station to station. A simple setup keeps the activity organized while giving everyone plenty of creative freedom.
To help spark ideas, display several finished pencils upright in mason jars, pencil cups, or small containers around the table. Seeing different color combinations and styles often inspires kids to try something new.
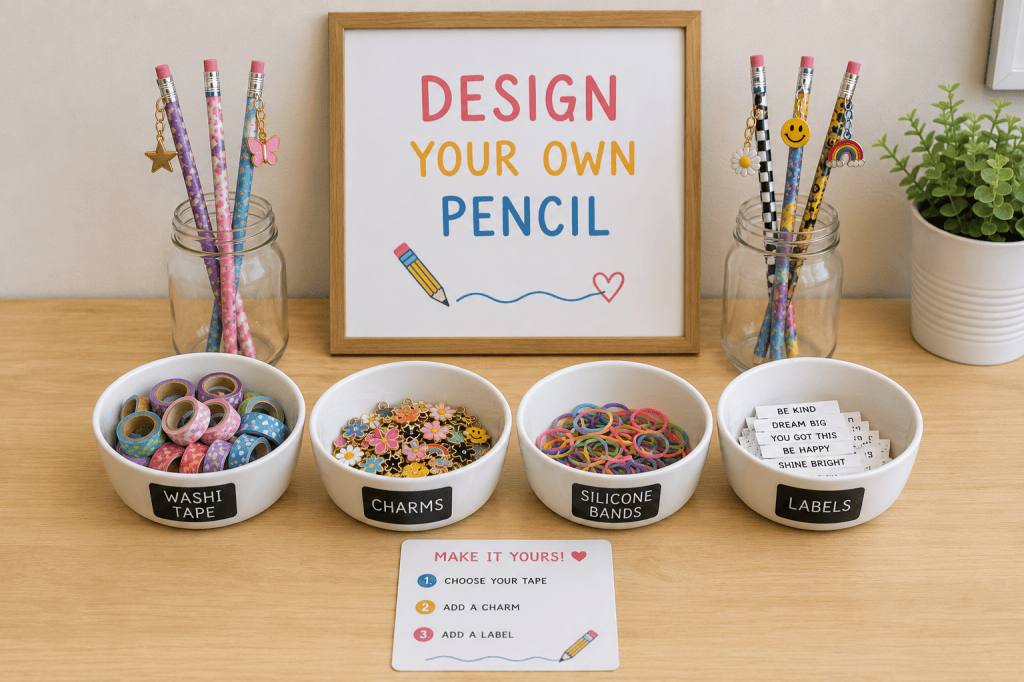
One child might choose bright rainbow tape and a smiley-face charm, while another creates a sleek black-and-white design with their name printed on a label. Since every combination is different, no two pencils look exactly alike.
How to Attach Pencil Charms
Adding charms is easier than it looks.
Slide a small silicone band through the charm. Fold the band in half so you have two loops, then stretch both loops over the pencil just below the ferrule. The charm should rest snugly against the pencil.
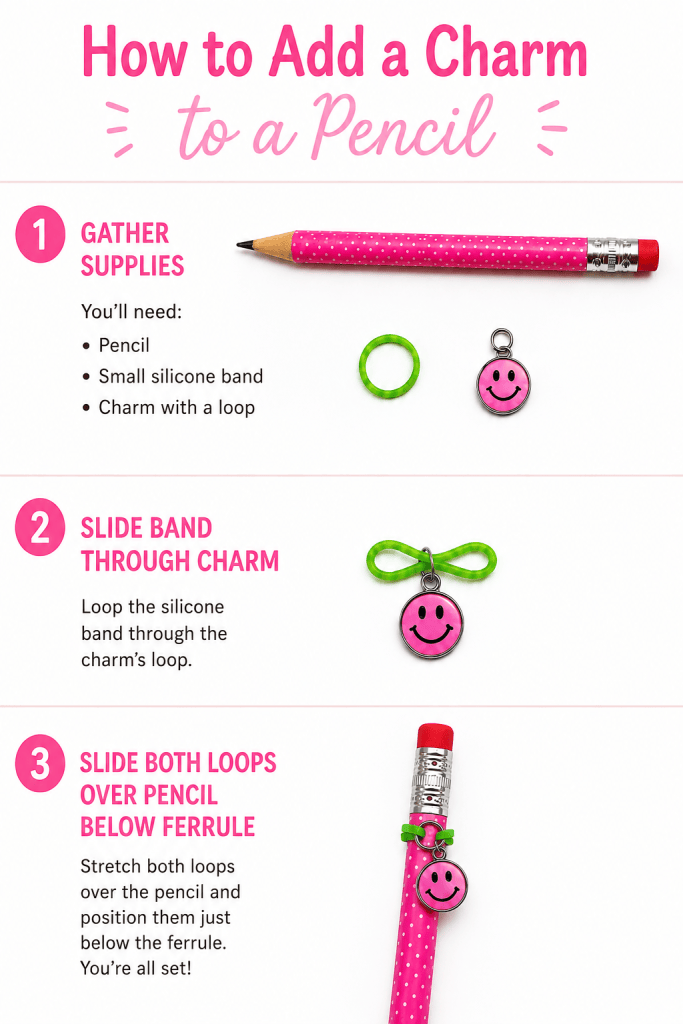
Pro Tip: Use stronger bands so they don’t break as easily, not the thin hair ties. We like the ones used to make rainbow loom bracelets. You can find a multi color pack here. You can also wrap matching tape around the band if you want it more secure. You can use other methods like drilling a small hole or wrapping with string or wire. We find this to be the easiest and the most kid friendly.
Hosting Tips
If you’re decorating with a larger group:
- Place supplies in divided containers.
- Give each child 2–3 pencils to decorate.
- Keep finished pencils standing upright in jars so they stay clean and visable.
- Use disposable tablecloths for easy cleanup.
- Create one sample pencil from each decorating style to inspire kids.
Frequently Asked Questions
What age is this activity best for?
Kids as young as preschool can decorate pencils using washi tape.
The labels and charms are best suited for elementary-aged children and older.
Will washi tape stay on all school year?
Yes. Washi tape sticks surprisingly well to pencils during normal use. If an edge begins to lift, simply smooth it back down or replace the strip with a new design.
What pencils work best?
Standard wooden pencils are the easiest to decorate because washi tape sticks well and charms fit securely below the eraser.
We like these Pencils
Can teachers use this in the classroom?
Absolutely.
This is a fantastic first-week-of-school activity, indoor recess option, reward day project, or classroom party station.
Where can I find pencil charms?
Craft stores, jewelry suppliers, and online marketplaces all carry inexpensive charm sets with dozens of different designs.
I like buying larger variety packs so every child has plenty of choices.
Check out the ones we found here!
Final Thoughts
A pencil decorating bar is one of those activities that’s simple enough for a classroom but special enough for a party. Kids leave with something they’ll actually use every day, and parents love that the supplies are inexpensive and easy to find.
Whether you choose the quick washi tape version, personalized labels, or a full decorating bar with charms, this is a fun way to celebrate the start of a new school year.
Happy creating!


Leave a Reply